What you should try first
The gear changes on the Nexus-7 should be as smooth as on a motobike, you can do so at anytime, whether stationary at the traffic lights or climbimg steep hills. If it seems to be sticky, try adjusting the gear cable first.
Take a picture of the adjuster before moving it and try turning just half a turn then test the gears to see if they are better or worse.
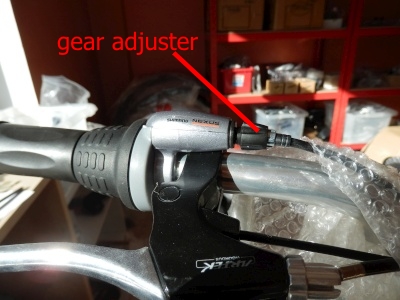
If the optimal setting is not reached and you have used most of the range available on the adjuster, it may be better to check if the cable does not have any kink in it.
If you need to replace the cable or want to check the settings
properly, you will have to access the pinch bolt at the other end of the
gear cable (opposite side of the adjuster).
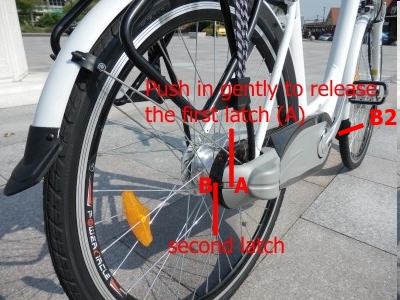
Open the chainguard
The chainguard is composed of 4 pieces: top (perspex), bottom (perspex), chainguard (grey ABS) and sprocket guard (grey ABS at the back wheel).There are 3 latches, A, B and B2. B and B2 hold the top and bottom pieces to the chainguard piece.
Gently push in latch A (while looking at the gap between A and B) then prise the spocket cover out.
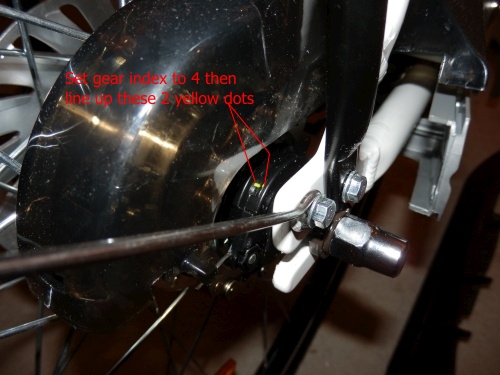
The yellow dots
Before you start, put the gear index to 4.Take a picture of the yellow dots
They should be facing one aonther
If the outer dot (nearer to you) is to the left (eg 11 o'clock), the cable length is too short, you'll need to move the pinch bolt towards the cable end.
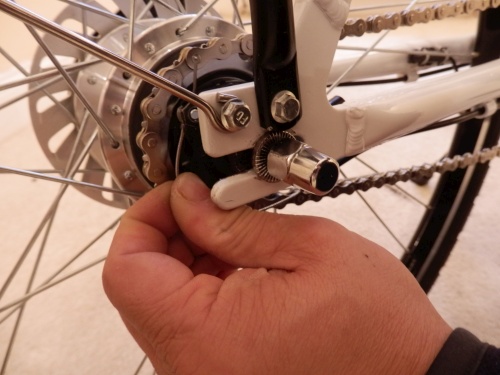
Removing the pinch bolt from its slot
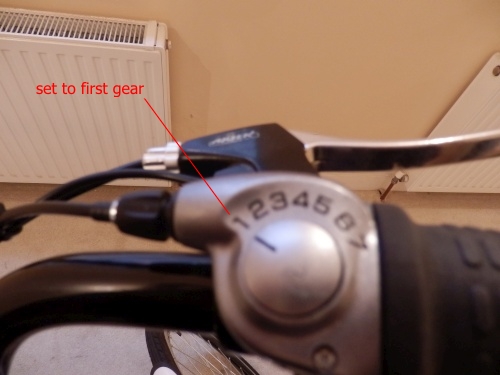
Step 1: change to 1st gear to make the job easier.
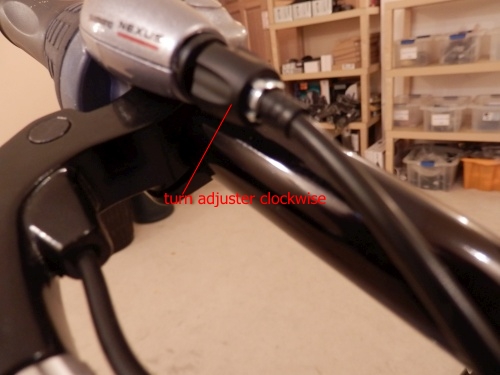
Step 2: turn in the adjuster clockwise to gain maximum range when you finish.
Step 3: locatye the flat raise thumb platform at the top of the gear plate.
Try pushing on it, it will rotate the lear plate easily.
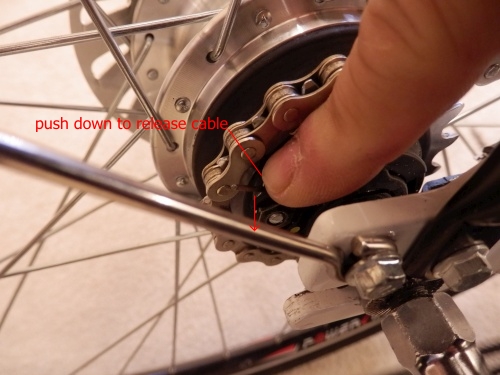
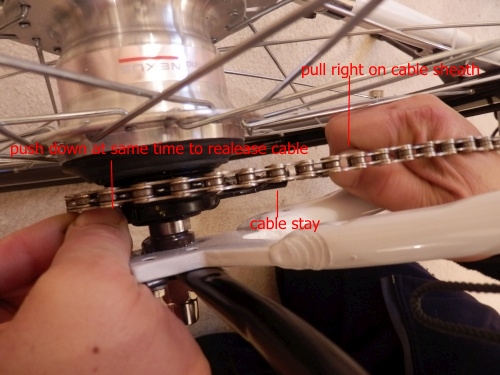
Step 4: push and turn the gear plate anti-clockwise to release the gear cable, pull on the cable sheath at the same time to disengage the sheat from the cable hold.
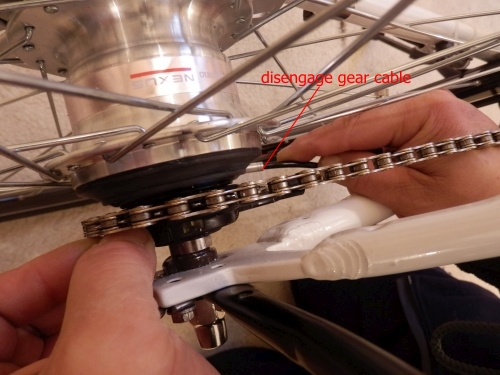
Step 5: the cable is now freed from its holder. You can now remove the pinch bolt from its slot.
Step 6: the pinch bolt is now free, adjust it as needed before re-assembling.
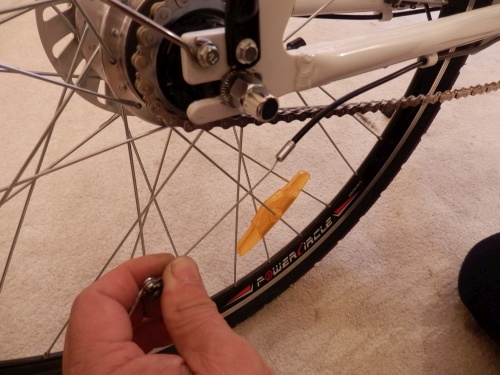
Before you re-assemble, set the gear index to 4, adjust the cable so the two yellow dots come face to face.